Passion for the past, brought to the present...

The Clothes of the Ordinary People

Paul Hargreaves • Jun 03, 2021

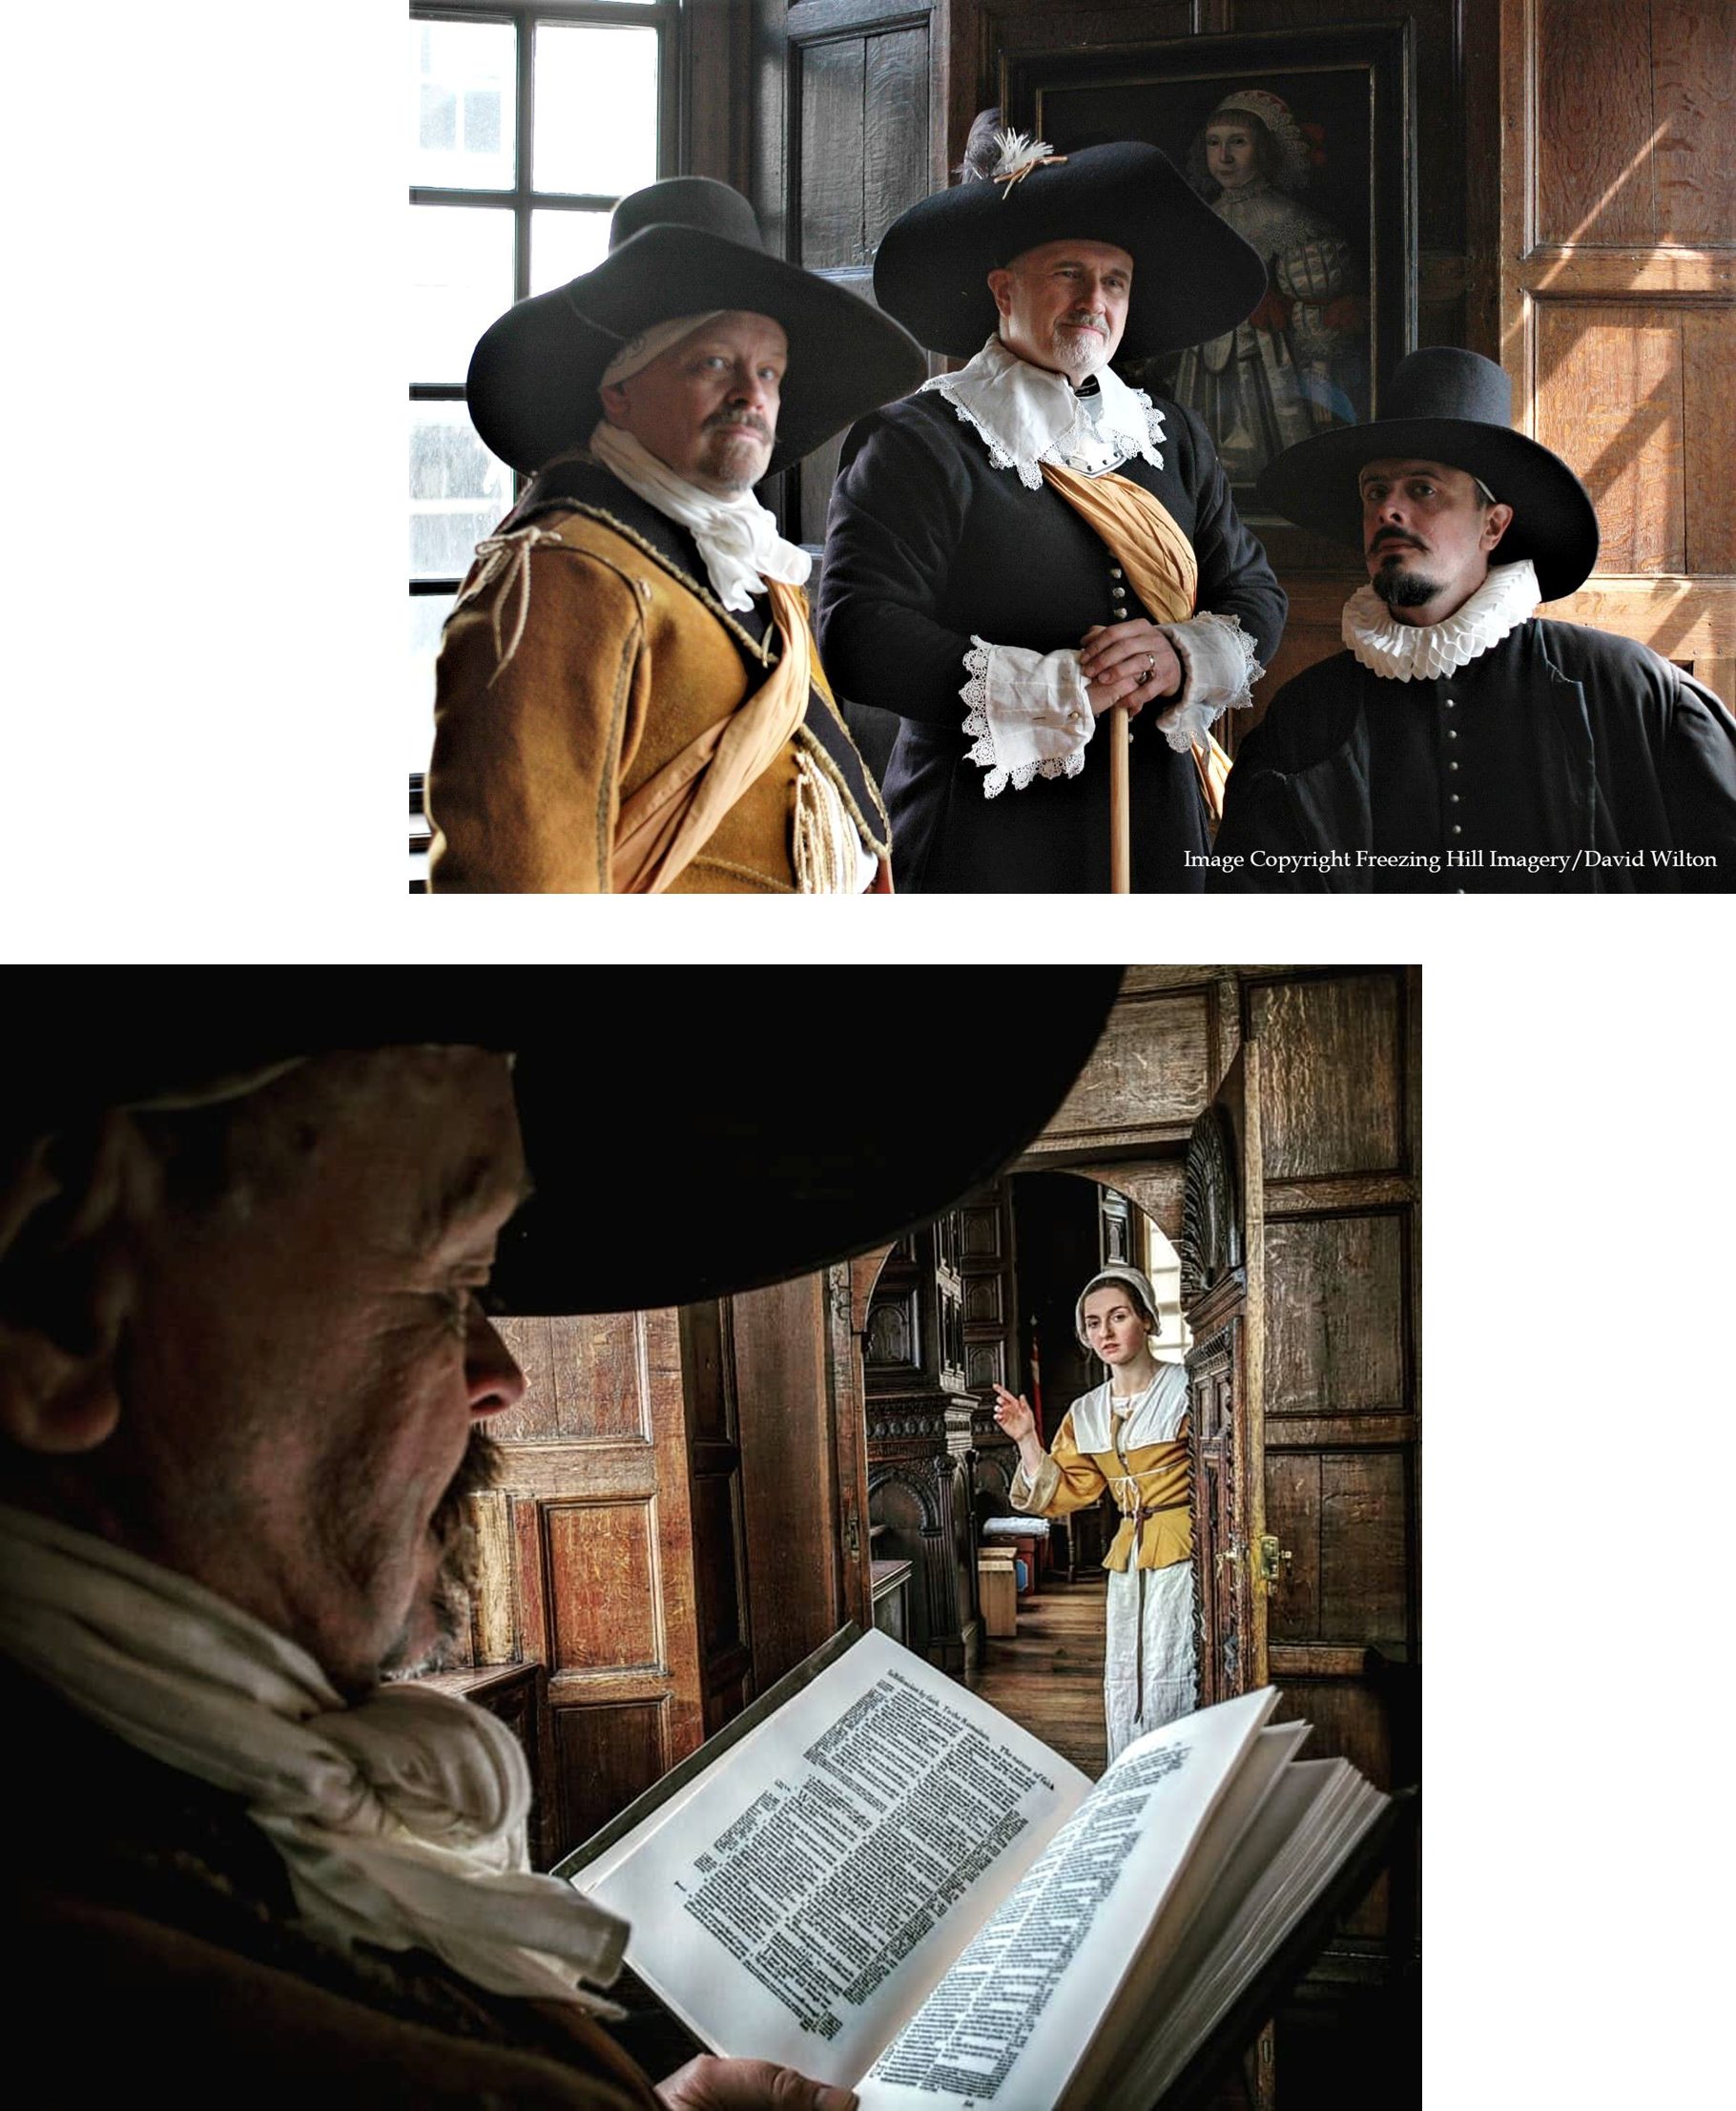
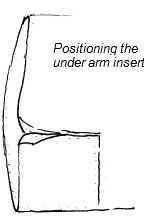
A Guide for members of Colonel Nicholas Devereux’s Regiment...

Introduction

This is a guide designed to support new and existing members to produce a convincing representation of the clothing of the common people in the mid seventeenth century. It is written with the aim of supporting members with getting together a typical basic outfit that can then be developed further as expertise, interest and finances allow and involvement in the hobby grows. It is not intended as a great academic work covering every aspect of clothing of the period. Neither is it produced with the intention of being the definitive truth about what people wore in the period – the only way we will ever know for sure is by travelling back in time and seeing with our own eyes! It is simply one possible interpretation of the written, pictorial and (rare!) surviving garments from which has developed a representation of clothing of the period which, through being worn at a range of events and while undertaking period activities in a range of weather conditions, has been proved to work – being reasonably comfortable, waterproof and warm, while looking convincing as a fairly standard outfit for the period.


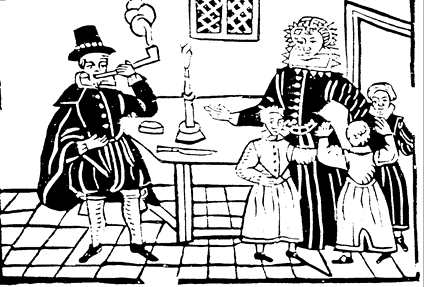
The clothing that we wear for re-enactments and re-creations matters. Beyond the uniform coat colour and pattern that those members who are portraying a military role are required to wear, we have a good degree of choice over our appearance and what we select to wear in our representation of a person from the past. Clothing is also the first thing that the public notice about us as individuals and one of the first things that they are able to compare with their life today. There are countless questions from curious members of the public about what we wear – what it is made of, what it is like to wear, why certain things are worn. The clothing worn by members also affects how we carry ourselves, how we act, and how we under- take activities.


Costume in the re-enactment of the seventeenth century has suffered from a number of fads, fashions and inaccuracies, some of which have survived since the 1960s, some of which have dominated for a few years and then faded away but can still linger in some quarters. However, recent years has seen a growing interest in the development of realistic representations of common clothing. Those with a more academic skill than I have focused on written evidence (wills, inventories and the like), examined a full range of pictorial evidence (wood cuts, illustrations, paintings), and undertaken practical experimentation (making the things to see if they work). This guide is based on much of this research by many others, together with practical personal experience of making and trying out the garments.


Acknowledgements

As stated above, this guide draws on the work of those who have undergone extensive research into the clothing of the period. The major sources used for this guide are listed below. Anyone looking for further information on the clothing of the period should explore these texts further. Some of them sit slightly outside our period or deal with the clothing of the wealthy. However they are invaluable as an illustration of the tailor‘s art and give an insight into how garments were cut and constructed.


  • Clothes of the Common Man 1580 – 1660  Robert Morris (Stuart Press ISBN 1 85804 162 7)


  • Clothes of the Common Man 1580 – 1660 Part 2: Making the Garments  Jane Huggett (Stuart Press ISBN 1 85804 180 5)

  • Clothes of the Common Woman 1580 – 1660  Robert Morris (Stuart Press ISBN 1 85804 160 0)

  • Clothes of the Common Woman 1580 – 1660 Part 2: Making the Garments  Jane Huggett (Stuart Press ISBN 1 85804 169 4)

  • Children’s Clothing 1580-1660. Jane Huggett. (Stuart Press. ISBN 978-1- 85804 218-3)

A guide to making appropriate clothing for the children on the lower orders.

  • Patterns of Fashion: The cut and construction of clothes for men and women c. 1560 – 1620 Janet Arnold (Macmillian Press ISBN 0 333 38284 6)

Deals with upper class clothing slightly earlier than the period. However invaluable as an insight into the work of the tailor.

  • Patterns of Fashion 4. Janet Arnold. (Macmillan. ISBN 978-0-333-57082- 1)

  • A study of surviving linen garments from c.1540 - 1660.

Again, a focus on clothing of the upper classes. However, invaluable as a reference for the art of the seamstress.


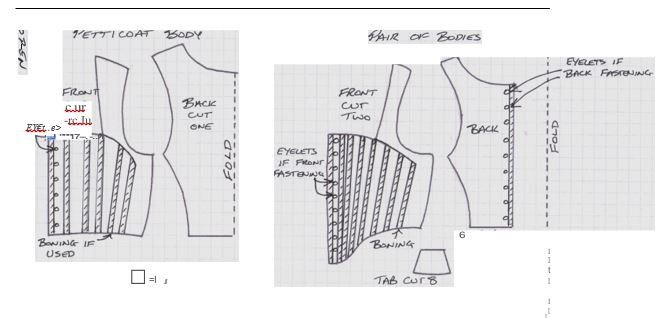
  • How to make a Petticote and Bodice of 1580-1660. Gilly Morley. (Stuart Press ISBN 1 85804 244 5)

An easy to follow guide for making these essential basics of women‘s clothing.


  • Headwear, Footwear and Trimmings of the Common People 1580- 1660. Robert Morris. (Stuart Press. ISBN 1 85804 170 8)

As the name suggests, this is a useful booklet for those finishing details of a costume - the buttons, the lacings, the fastenings , the hats and so forth.


  • Textiles and Materials of the Common Man and Woman 1580-1660.  Edited by Stuart Peachey. (Stuart Press. ISBN 1 85804 167 8)

An exploration into the types of fabrics that were used for the clothing of the common people.


  • Dyeing the Clothing of the Common People 1580-1660. Peachey and Hopkins. (Stuart Press. ISBN 1 85804 173 2)

A study of dyestuffs and the processes used to dye cloth in the period.


Some websites:

English Civil War (ECW) Living History Resource

Website http://lhresources.wordpress.com/

How to make and source things Mid 17th Century‖. Many images of clothing of all classes, together with book lists that may prove useful.


Ready to Wear

Website: http://thegoodwyfe.blogspot.co.uk/

A site with the aim of developing and improving the quality of clothing in the re-enactment of the mid-seventeenth century.


The 1640s Picturebook

Website: http://the 1642goodwyfe.wordpress.com/

Images from the mid seventeenth century that can act as a guide for clothing.


As with all websites, the quality of the contents cannot always be guaranteed. Browse with care! Devereux’s Regiment are not responsible for the content of such websites.

Today, attitudes to the display of the human form are very liberal. In the media we are familiar with images of women in swimsuits, men appearing in adverts fresh from the shower wearing nothing but a towel. The naked form is familiar in magazines, on display boards, in films. Street fashions sometimes leave little covered. Short skirts and strappy tops dominate women‘s clothes shops in the summer season. Male fashion is similarly informal – recent fashions for low slung jeans showing the top of the underwear, for example. When it is hot, many men will divest themselves of their shirts and feel comfortable enough to walk around in public with their chest uncovered. Some people only dress smartly when it is required or expected – at the workplace, visiting restaurants, at weddings and so forth. Compare this with our grandparents‘ and great-grandparents‘ generations. Their atti- tudes to clothing from their youth continued into their later life. For many, looking smart was a sign of respectability. Women wore modest length skirts and kept their bodies covered, with many habitually putting on a coat or jacket when going out in public, even in the summer. Amongst men, the wearing of ties was common, even when involved with manual labour, and the hat or cap was almost universal. Men considered themselves quite in- formal if they were in their shirt sleeves. Only when it was really hot would shirts come off – even then the vest probably stayed on! In many ways, these attitudes were probably closer to the attitude for the mid seventeenth century.


For the common folk in the seventeenth century, it was expected that you would cover up for decency and also for protection from the elements – we are dealing with a time before central heating and when it is known that the climate was colder than today. It was not considered the done thing to show too much of the body. For women, the skirts reached the ankle. They were never seen in underwear (smocks were the underwear layer of the period, but it is unfortunate that many women in some seventeenth century re-enactment groups are prepared to be seen without a suitable a garment covering their upper body, thus leaving the smock on display). The hair would be tied back and kept covered by coifs and cloths, partly for modesty and partly for hygiene reasons. 


Waistcoats and gowns would be put on if a woman was going out of the house. Women may have stripped down to their petticoats and bodies when working in fields or the laundry, but this is for the period would be far enough! Even then, neckcloths were probably kept on to cover the chest (and it also helps to prevent sunburn).


For men, both a hat and a doublet would be worn when out in public. Shirtsleeves would be acceptable when working in hot weather or when involved in heavy labour. Even then, the wool of doublets may have offered a better degree of protection – wool will protect from flying embers or from scratches from thorns etc. Again, when working in the fields, keeping covered prevents sunburn.


Many fashion statements today are chosen deliberately to make the individual stand out. A bright shirt and tie combi- nation, a loud t-shirt, ripped and torn jeans, extreme footwear are all statements of individuality. Many youth movements (Punk, Goth, Grunge etc.) developed 'uniforms‘ in an attempt to mark the group out from society. Extreme clothing today often provokes nothing more than a stare, a laugh, an envious or admiring glance. In the seventeenth century, to look different could cause you difficulties. Clothing marked out your position and status in society, and your position and status in society dictated what  you  could get away  with.

Going  without  your  hair  covered  for a lady at court was acceptable. For a common woman it was a sign of disreputability. For a common man to have no doublet or to go bare headed could be seen as a sign of being a vagrant. To deliberately flout the expected codes of dress was to set yourself apart from the rules of society. In so doing you would lay yourself open to all of the consequences that this could bring. For the modern re-enactor the message is simple - look as respectable as you can at all times. Keep yourself covered at all times. It may seem strange to begin with but it soon becomes almost second nature.


Appropriate Materials

The materials available to the people of the time really dictate what can be used when recreating the clothing of the period. Modern clothing uses a wide range of materials, both natural and manmade fibres. Today our wardrobes contain cotton, linen, silk, polyester, lycra, nylon, wool, leather, plastic, fake fur – the list goes on. In the seventeenth century, the range of materials was much more limited.


Wool

Wool had been a staple of English trade with the continent since the Middle Ages. It was the basic fabric for much of the outer clothing of the lower orders in the seventeenth century. It was available in range of widths and qualities. Terminology from the period uses a number of different names to describe types of wool, some of the more common being:

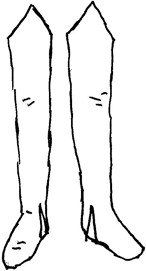
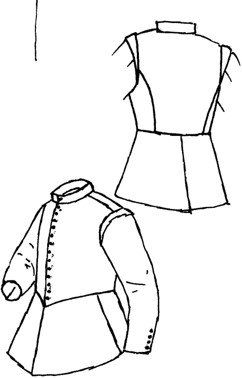
  • Kersey – Kersey was a narrow, hardwearing fabric with a twill weave (leading to it having diagonal parallel ribs on the surface). It was strongly associated with the clothing of the common people. It was used for stockings, sometimes for doublets and women‘s waistcoats or petticoat skirts.
  • Russet – Russet was another narrow fabric (36‖- 48‖ wide or so). Russet was unfinished and came in the colour of the fleece that it was woven from – probably mainly greys and browns. It was strongly associated with the clothing of the common people, particularly in the countryside. It seems to have been used for doublets, women‘s waistcoats, britches and petticoat skirts.
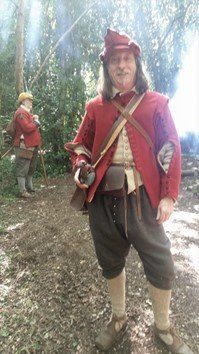
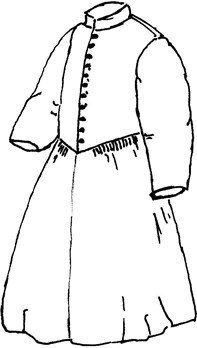
  • Broadcloths – Broadcloths were just that – cloths that were broad! They would typically be woven on a loom that produced cloth that was up to 60‖ wide, sometimes wider. Broadcloths came in a range of qualities depending on the finish. The smoother and more finished the fabric, the more expensive it would be. Broadcloths were used for better quality clothing, gowns, coats etc. It was often used for soldiers‘ coats in Civil War as it was hard wearing and waterproof.
  • Flannels – Flannels were lightweight wools that were sometimes used for children‘s clothing and used for linings of adult garments.
  • Cottons – Cottons in the seventeenth century have very little to do with the cotton plant! Cottons were narrow wools (36‖-48‖ wide) and fairly lightweight. They were finished so that they had a slightly fluffy surface  – this  process  being  called  'cottoning'.  Cottons  were  used for linings of outer garments and also were a good fabric for children‘s clothes.
  • Frieze – Frieze was a very thick, heavy woollen fabric made from fleeces that were of poorer quality. Looking quite hairy in finish, frieze was used for thick coats, jerkins and gowns for winter warmth.
  • Worsteds – Worsteds were wools woven with twisted yarns. They were very hard wearing fabrics used for gowns, doublets and some- times aprons.
  • Bays – a loose weave woollen fabric. Often used as a lining material.


Linen

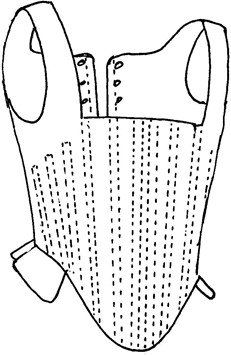
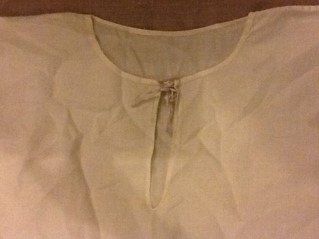
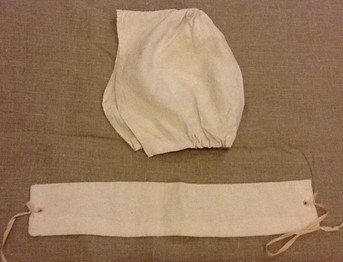
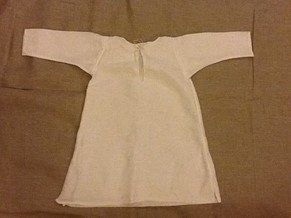
Linen is a thin material made from the long fibres of the flax plant. Some was produced domestically, but a large amount was imported from Scot- land or the continent. Linen was used for underwear and as a lining material. Thicker linen canvas was used to interface other fabrics in garments like doublets and women‘s waistcoats, or even as the outer material for these as lighter weight summer wear. It can be used as basis for petticoat bodies to provide stiffness and support. As such it could be lined with thinner linen and attached to a linen or woollen outer. Thinner linens would be used for collars and coifs. As with wool, the finer and more finished the fabric, the more expensive it would be. The very thinnest linens (often called lawns) were almost transparent at times and would be used for collars and cuffs by the wealthy. Bleaching linen prior to sale would have added to the cost, but white linen does seem to have been the norm for underwear. However, natural (light brown through to silver grey) linen was probably also used for this purpose and often becomes bleached through the laundering process. Some linens may have been dyed for use as lining materials. References (written or visual) to coloured linen being used for shirts and smocks are rare and are often linked to the upper classes (many pre- dating the period that we are representing). Some references exist to collars being starched in light blue or yellow dyed starch to extend their life once they had been worn for a long time and had become ingrained with dirt, or to keep up with some fashion. However this seems to have been a limited practice for those with wealth enough to keep at the cutting edge of fashion. To represent the ordinary person, white or off white linens are more appropriate for the underwear layer.
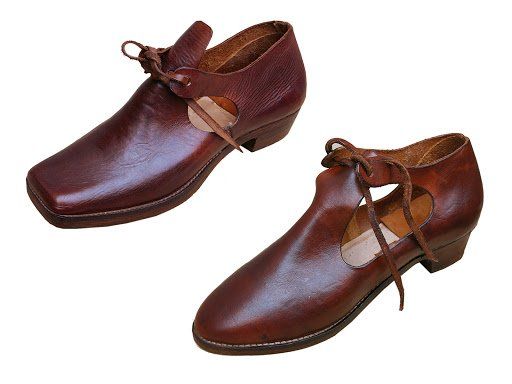
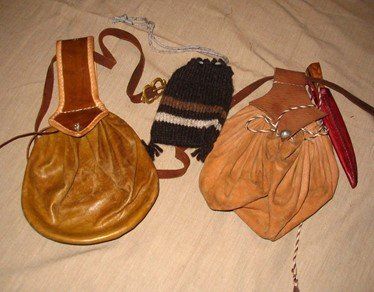

Leather

Leather as a clothing material was quite widespread in the seventeenth century. It would be naturally tanned – chrome tanning was not used until later. It could be dyed with natural dyes (reds, yellows and yellow-greens are easily obtainable), but this added to the cost and may have been limited to purses and thin belts. Leather was used for shoes and boots. Jerkins, worn over doublets to protect them during hard work, do survive, along with references to doublets and britches being made from leather. It was also used for thick buff coats, worn for protection from sword cuts by officers or the wealthy. A favourite re-enactment fallacy has lasted from the 1960s that common soldiers wore these. Cavalry troopers are recorded as wearing them, and there are some references to members of the London Trained Bands having them, but there does not seem to have been a mass issue to the armies of the time. The fact is that buff coats were made of highly expensive thick hides, often treated with ochre to give them a yellow colour. The cost was beyond the pocket of ordinary people and too expensive to waste on the cannon fodder of the army. The buff coats available from most re-enactor traders bear little resemblance to the real thing.


For women, there has been a recent re-enactment fashion for thick leather corsets, often worn without an over garment, citing a few references to leather bodies being made for wealthy women. The leather bodies that are referred to have thin soft leather outers, decorated with stamped patterns, while the stiffness of the garment is provided by whalebone or reeds. They survive from the wardrobes of the wealthy and probably would not be replicated further down the social scale. Such thick leather corsets are best avoided.


Silk

Silk in large quantities would be beyond the pocket of most common people. Some references to small silk items do turn up in wills and inventories for common people. It is best to treat these almost as family heirlooms, as second hand clothes, or as remarkable items worthy of special mention. It is best to avoid silk unless you are making a garment of the upper orders.


Mixed Fibres

A few examples of mixed fabrics exist in the period. Fustian was one fabric of period that may have had cotton as we know it as one of the fibres. Fustians had a cotton or wool weft and linen or wool warp. They could be used for doublets, gowns, or for lining other fabrics.
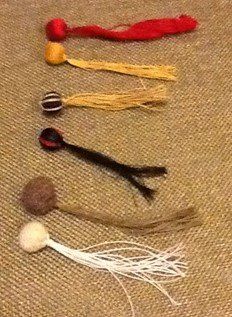
Lace

For the wealthy, lace was a common feature of their clothing – lace edging was often to be found on collars, cuffs, coifs and neck cloths as a mark of wealth and status. For people further down the social scale, some evidence of lace edged garments can be found in wills and inventories of the lower orders. However, as with silk, it is best to regard these as exceptional rather than the norm. It is also worth noting that some think that lace was also the term used for simple tapes. Linen tapes could be used to bind hems, so in this case it may be possible to have, for example, a petticoat trimmed with lace – a series of bands of tape sewn onto the skirt partly as decoration and partly to hold the shape of the hem away from the legs. Frilly lace is best avoided when reproducing period clothing for the lower orders as the modern machine made lace that is widely available today is almost without exception inaccurate for the period. Hand made lace can  be made using patterns appropriate for the period, but it can be hard to find and is often expensive to obtain.


Decorative braiding

As with lace, braids and cords were used to decorate the clothing of wealthy. Just like lace it took time and money to create, therefore it would be a sign of wealth and status. Braids and cords may have been removed from the clothes of the better sort before they found their way on to the second hand market. Braids in the seventeenth century would often be made from silk and threads made from silver and gold – all expensive materials. Some may have found its way in to the possession of the lower orders, through the second hand market or as short lengths purchased from the petty chapmen (travelling purveyors of trinkets, buttons, small amounts of trimmings and lace and so forth). However, as with lace, finding appropriate period braids or cords can be difficult. Modern machine made braid is broadly inappropriate for the period and is best avoided. Woollen and linen tapes can be found, but caution is needed as some tapes and braids are, again, not suitable for the period. If in doubt, don‘t buy! Having plain clothing in appropriate colours and made using appropriate materials and pat- terns is better than then using obviously modern, incorrect braid and trimmings.

Fastenings

Options for fastening garments in the period were laces, buttons, pins and hooks and eyes. Petticoat bodies and pairs of bodies would tend to be laced with cords. Gowns may be laced, buttoned or hooked. Waistcoats could be buttoned or fastened with hooks and eyes. Doublets and britches were fastened with buttons and the waistband of britches could be hooked or laced to a lacing band or tabs on the inside of the doublet waist in order to keep britches up.


As with trimmings, good outfits can be ruined by the wrong buttons. The options for buttons include thread covered buttons, cast metal buttons, or cloth buttons. Thread covered buttons have a wooden bead at the core. Silk and/or linen threads are worked around this wooden bead to cover it. A number of long threads are left forming a shank. These threads are passed through the outer layer and any interlinings of the garment and are knotted over a cord secured to the inside. This cord is then covered by the lining. Cast metal buttons (commonly made from pewter and sometimes referred to as 'tin' in the period) were often made to imitate  thread covered buttons and included a long shank that could be passed through the outer layers of a garment and secured to a cord in a similar way to thread covered buttons. 

Other cast buttons appear in the period which have smaller shanks on the reverse to be sewn directly to the outer layer of a garment. A cheap alternative could be produced from scraps of fabric, often of the fabric used to make the garment. Discs of fabric could be drawn up and stitched to form solid sphere-like buttons. Long  threads could be then sewn to the buttons and used to secure these to a cord in the garment.


Flat wooden buttons with holes through them for stitches or wooden bead type buttons (without thread covering them) should be avoided.


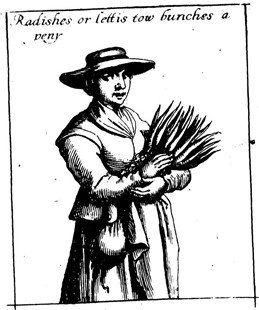
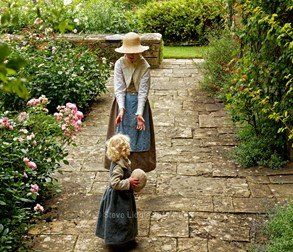
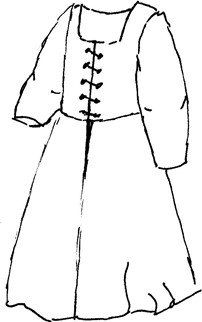
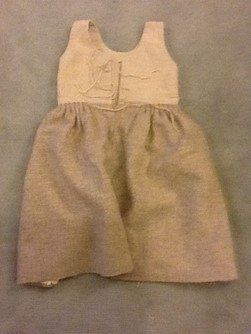
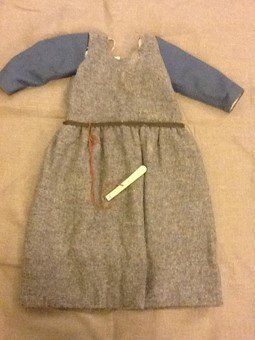
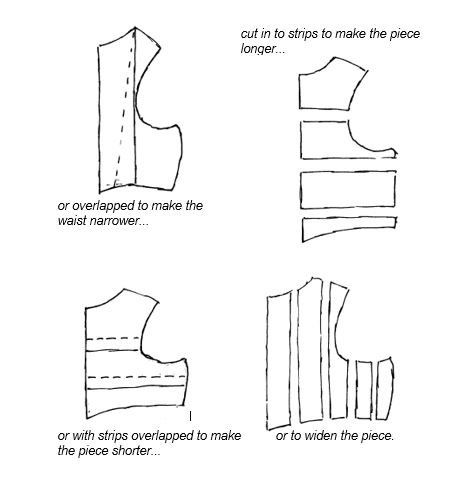
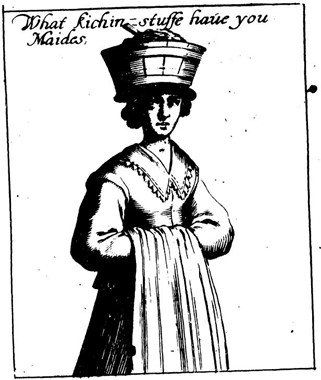
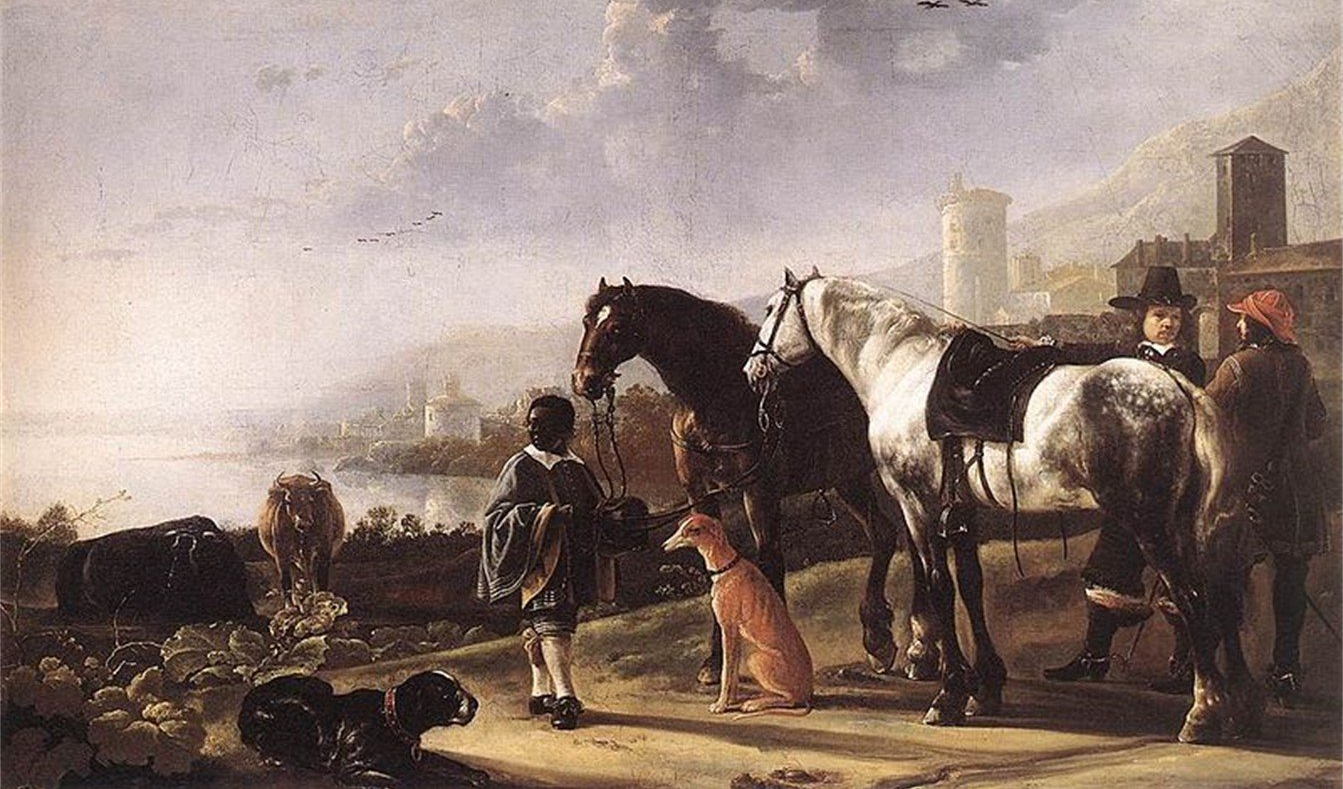
Women—What did they wear?

The Smock

The smock was  the basic underwear  garment for women,  worn  to protect outer clothing from dirt and grease. In re- enactment   circles,   the   term   'shift'   dominates,  but  'smock'  seems  to  be  a  more widely used term in the period. Smocks seem to be made of white or natural linen. They were garments that reached to mid calf, with sleeves reaching to the wrist. Necks would be tied with tapes or cords or possible a small button and loop. Long slits were often cut from the neck to midway down the torso to make it easier to get in to the garment. A long slit here is also of benefit if breast feeding – a major consideration for women of the time. The raw edges of these long slits would simply be rolled back and hemmed without additional facing strips being attached. The wrists could also be tied of have a small button and loop to fasten them if they were gathered into a thin cuff.


Ties may have been more common than buttons for fastening smocks as buttons may be damaged in the laundering process of the time (this could involve repeatedly beating clothes with wooden paddles which could crush buttons). Sleeves could also be shaped and hemmed so as not to require gathering in to a cuff. In the re-enactment world, there has long been a fashion for smocks that are drawstring, off-the-shoulder numbers. These are not appropriate for the period being a later style.


The Hose

Hose were long stockings reaching to the mid thigh. There are two options available – knitted hose or cut cloth hose.


For knitted hose, ideally use yarn that is 100 percent wool and that is either undyed or dyed in sad colours (greys, browns, naturals).


A pattern can be found at http://www.ravelry.com/patterns/library/pre- literate-stockings


Several examples of cut cloth hose survive, as do written references to hose of cloth.


Bodies, Skirts and Petticoats

For the layer of clothing over the smock, two options exist. Women can either wear a pair of bodies (a corset) with a skirt, or a petticoat.


Bodies are known to have been worn from the sixteenth century by the wealthy in order to achieve the fashionable silhouette, the shape of the bodies changing as styles changed. Whale- bone was known to be used by the wealthy to stiffen these garments, while the fabrics used would similarly reflect the wealth of their wearers – silks and soft leather often being used in conjunction with linen. The fit and shaping of these garments were dictated by fashion rather than practicality, so care should be taken when using these surviving examples as inspiration for lower class clothing. There are, however, some references  to  bodies  or  'French  bodies'  in  inventories  from  the  ordinary classes, so there is some evidence that corset type bodies may have been worn further down the social scale, although probably not as fashionably shaped as those of the upper orders. For the common woman, reeds would have been a more accessible stiffening material, while a front lacing to close them would have made getting dressed without the aid of servants easier than the back fastenings of the wealthy. Bodies are highly individual garments and fit tightly to the body in order to provide support for the bust, but nowhere near as tight as the corsets of later periods – you still need to be able to work in them! As mentioned earlier, thick leather corsets are available through some traders making costume for the re-enactment fraternity — these should be avoided as they are not appropriate for the period.


If wearing a pair of bodies, a separate skirt (or petticoat) would need to be worn. Some evidence also exists of more than one skirt being worn (in effect an underskirt and an overskirt). In this case, the overskirt would probably be of wool, while the underskirt could be of wool or linen (although whether linen was used for this purpose is a point of debate). Skirts should reach to just above the ankle when portraying the clothing of working women (much more practical when walking in muddy fields or dirty streets) and contain an appropriate amount of fabric (a rectangle 2 ½ to three yards in width), cartridge pleated to the waistband which can be fastened by hooks and eyes or tapes. A slit at the top of the back seam makes it easier for the wearer to put on the skirt.


An alternative to the bodies and skirt is a garment that seems to have comprised a body and an attached skirt worn as a single garment also referred to as a petticoat or a petticoat with bodies. The petticoat body in this case would be tight fitting and usually sleeveless, cut to the natural waistline with a squared off neck and front lacing through eyelet holes. It would probably be made from linen canvas or maybe a woollen outer lined in linen. The cut of the body provided support for the bust in the same way as a separate pair of bodies did. Petticoats have proved to be effective garments for pregnant women or those who are breast feeding children (a major concern for women of the period who spent much of their adult lives pregnant). A pregnant woman could loosen off the petticoat as required, negating the need for a separate maternity garment. Petticoat bodies may have been stiffened with reeds or with thick linen canvas interlinings pad stitched together. Modern boning methods could be used as an alternative for stiffening in both corset-type bodies and petticoat bodies if required as long as they are not visi- ble when the garment is made up. If cut correctly and stiffened with canvas, the petticoat body can provide support enough for all but the fullest bust. The woollen skirt would then be pleated and sewn directly to the waist of the body with a slit part way down the front seam to make it easier for the wearer to get the whole garment on – this will be hidden by the apron.


Colours that may be appropriate for skirts are natural shades (greys, creams and browns), but red also commonly appears as a colour for skirts, with some blue and green skirts also identified in wills and inventories.


A lady wearing a petticoat with attached body. The body is stiffened with pad stitching. The neckcloth has been removed to allow the neckline of the body to be seen in the photograph.

The Waistcoat

The waistcoat is just that – a short coat reaching to the waist. It would be worn over the bodies / petticoat. Waistcoats can difficult to see in most illustrations and woodcuts. Many female re-enactors tend to wear garments inspired by the highly fashionable clothing of the upper classes, often with stiffening (possibly negating the need for a separate corset or providing additional stiffening), lacings to close them, fashionable square necklines and sometimes with large sleeves that fashions from time to time dictated. Some of Hol-lar‘s etchings show ordinary women wearing this kind of waist-coat, obviously trying to copy elements of these more fashionable garments. 


Other depictions of lower class women show waistcoats that are high necked garments, covering the chest rather than exposing it as the above mentioned more fashionable bodices do. In these cases, the sleeves appear to have been cut quite tight to the arm and reach to the wrist rather than the large voluminous half length

sleeves of the wealthy. 

These garments reach the hips and seem to be shaped to flare out slightly over the top of the skirt. Waistcoats can be made from wool lined with linen, or from a linen outer with a linen lining (an option for the summer). They can be fastened with hooks and eyes, buttons or laced depending on the style. 


Waistcoats could be of natural colours or dyed fabrics. A good idea is to use a different colour to the skirt worn in order to avoid an outfit looking too designed. Also try to avoid a modern eye to colour combinations. Having one garment of colour and others that are natural in tone is probably better than having everything that you wear dyed.

The Gown

The gown was a full length over garment, sometimes worn for warmth (possibly in conjunction with the waistcoat as well if needed) or worn as a replacement for the waistcoat. Gowns could be a sleeved body with an attached skirt, made from wool (often frieze of broadcloth) with linen linings (or even a thin woollen lining), and fastened with hooks and eyes.

The Apron

Aprons are simple rectangles of cloth worn from the waist to a few inches above the hem of the skirt. Ties sewn to the apron allow it to be tied about the waist. Aprons are recorded as being made form either linen or wool. There is evidence of black, white and red aprons mentioned in wills and inventories.

The Coif and Forehead Cloth

For women of the period, keeping the hair covered was a matter of hygiene and modesty. For modern re-enactors, keeping the hair covered hides inappropriate hair styles and colours. Head coverings would typically consist of a forehead cloth and a coif. The forehead cloth was a triangular or rectangular piece of linen tied with strings or tapes, as the name suggests, around the forehead a little like a modern bandana. Over this would be worn a coif. 

Several examples of patterns for coifs exist from the period. Coifs can be pinned to the forehead cloth in order to keep them in place. While numerous examples of embroidered and lace edged coifs survive from the period, for the common people these are best avoided in favour of a plain linen coif and forehead cloth.

Neckcloths

Neckcloths were worn over the shoulders and are variously also referred to as kerchiefs or necker- chiefs. The simplest style can be made from a square of linen about 30 to 36 inches square. When hemmed, this can be folded on the diagonal and worn around the shoulders, being fastened with a brass pin at the front or tucked into the neck of the waistcoat or gown. The neckcloth can often be the target for inappropriate lace edging or embroidery, or fastened with inappropriate vintage broaches – it is best to try and avoid these.


Shoes

A good pair of shoes can make an outfit. A pair of inappropriate shoes can ruin it. Strangely, footwear often seems to be a focus of attention for the general public who attend recreations and re-enactments.


Several options exist for shoes. In terms of colours, avoid brightly dyed leather. Go for browns or blacks. Round toes or square toes are both acceptable variations. Shoes with open latchets (holes in the side of the shoes between the side and the tongue) are quite common, but equally so are closed shoes. Most shoes at the time appear to have small heels. There is some debate about whether women wore ankle length boots at times (sometimes called 'start-ups' in the re-enactment world). If you make the decision to wear boots, then they would possibly be only for outside wear. It is best to buy a pair of shoes first as these can be worn both inside and out. Period shoes can seem expensive (£150 - £200 is about average for hand sewn ones). However, consider how much some machine made shoes available on the high street today can cost and the price is put into perspective. Good quality handmade shoes that are comfortable and hard wearing are a must and can be easily repaired should they need to be.


Accessories

Women would often wear thin belts to carry purses. These are shown in many images from the period and appear in written records as both belts and girdles. There are some references to silk girdles and it is possible that these items were leather with silk covering them. These are only mentioned occasionally and may have been treasured items. A range of designs for both belts and purses can be found looking at period illustrations.


A re-enactment fashion has been to hang a whole range of items and artefacts from the belt. It would be worth considering the context of the event. A bunch of keys suspended from a belt may be appropriate for a housekeeper in household setting. It may not be appropriate for someone working in the fields or following the army on campaign. A knife would be appropriate, but a fashion for hanging pewter tankards from the belt should be avoided. Pewter was an expensive alloy that you would not want to loose if you had it. Some re-enactors choose to wear chunks of dead animals (rabbits‘ feet for example, or pieces of fur) suspended from belts. Again there is little real evidence from visual sources of this practice.


Baskets are often seen in being carried by women in period illustrations. A re-enactment fashion has existed for decades whereby square, rough hessian bags are carried. Again there is little evidence for these being used (and the materials are inappropriate for the period) and are best avoided.


Jewellery can often spoil an outfit. For most common women, a simple wedding band would be the only item of real jewellery that they owned, and this may not always have been of gold. Few references exist to other items of jewellery being worn outside the upper classes. Another re-enactment fashion has been for antique broaches being worn to hold neckcloths or to decorate head gear. These are best avoided. Obvious modern facial piercing should be removed. Ideally obviously modern glasses should also be removed unless these are absolutely essential and cannot be replaced by contact lenses (and I appreciate that this can be difficult, needing glasses myself). There are makers of period acceptable frames for glasses, so this may be a consideration for some.


Make up – don‘t wear any.


Men - What did they wear?

Shirt

The shirt was the basic underwear garment for men, the main function of which was to protect the outer clothing from grease and dirt. Shirts seem to be made of white or natural linen. A re-enactment fashion for black shirts seems to have very little basis in evidence for the common people from the period. Shirts reached to the knee or even below, much longer than we are used to today, and there is a suggestion that, when tucked between the legs, longer shirts could act as an alternative to underwear for the nether regions. Necks would be tied with tapes or cords or fastened with a small button and loop, and could be simply shaped to the neck, have a small standing col- lar, or a larger (but not too large) full collar attached as required. The wrists could also be tied or buttoned to fasten them if they were gathered into a thin cuff. Ties may have been  used  to  fasten cuffs more than buttons as buttons may be damaged in the laundering process of the time (this could involve repeatedly beating clothes with wooden paddles which could crush buttons).  Sleeves could also be  shaped and hemmed so as not to require gathering on to a cuff. Shirts had slits from the neck to the mid torso to allow them to be drawn over the head. These slits would have the edges of the fabric rolled back and hemmed, rather than having additional facing pieces attached. Some shirts available from re-enactment traders have cross lacing used to close these slits. This is not appropriate for the period and should be avoided.


Hose

Hose were long stockings reaching to the mid thigh. There are two options available – knitted hose or cut cloth hose.


For knitted hose, ideally use yarn that is 100 percent wool and that is either undyed or dyed in sad colours (greys, browns, naturals).


Several examples of cut cloth hose survive, as do written references to hose of cloth.


Underbritches

Underbritches are thought to have resembled men‘s loose boxer shorts or possibly longer and resembling britches in shape. They would probably be made from linen with a waistband that could close with a lace and with a fly opening. Tapes could be attached to the outside of each leg to thread through hose to keep them up.


NOTE - Having period appropriate underwear is not essential! It is highly unlikely that you will be asked to show your draws to the public. Whether women wore a version of these garments is a topic for debate. Current theories are that women did not wear a form of this type of underwear.


Some upper class examples do survive, which confuses the issue somewhat! What a lady wears beneath her smock is, however, not something that we regulate!


Britches

Britches were worn reaching to the knee. Britches for ordinary men seem to have been commonly made of wool and lined with linen. Many different patterns can be evidenced from illustrations of the period. Broadly speaking, britches can be divided into open and closed britches. Open britches were not gathered at knee, being wide or narrow at the knee as fashion for the wealthy dictated. For working men, closer to the knee seems more practical. The hose would be kept up by garters tied just below the knee, or possibly tied on to underbritches. Closed britches seem to be slightly fuller but drawn in to fit snugly at the knee by a band of fabric. Many modern versions often have a tape threaded through this band, allowing for the bottom of the britches to be tied tightly to the leg, thus holding up the hose. There is some debate as to whether this was actually a method of fastening used at the time or whether the band at the knee was split on the outside seam and fastened with a tie through eyelet holes or by hooks and eyes. The fly of britches may be fastened by buttons. An alternative could be leaving the fly fastening open but covered by a large fly flap that tucks inside the britches.

Although not universal, britches may have be laced or hooked to the doublet, the doublet possibly having a lacing band or lacing tabs on the inside of the waist for this purpose. Pairs of eyelets worked through the waistband of the britches would allow for points to be used to tie the britches to corresponding pairs of eyelets in this lacing band, or hooks sewn at intervals onto the waistband of the britches could hook into corresponding holes worked into  the band or tabs on the inside of the doublet. Britches can be natural in colour (and most people tend to go for this option), or be of coloured wool.


Doublet

The doublet was the main outer garment for upper part of the body. For the common man, doublets would often be made from wool lined with linen. There is the possibility of linen canvas versions being made for wearing in the summer. In both cases an interlining layer of linen canvas would be needed for the body if padding and stiffening pieces were required. The waist of the doublets of the common man would probably have been cut to fit to the natural waist – the more fashionable doublets of the wealthy tended to be high waisted but this can be less comfortable and not as practical for keeping out the drafts. Doublets had skirts (small tabs) attached to the waist. The length and number of these skirts would vary. 


Generally the more skirts there were, the shorter they would be. One option is for four skirts that are about 10‖ to 12‖ deep. Six skirts could be attached that were 4‖ to 8‖ or 9‖ deep. Eight or ten skirts could be attached if the skirts were about 3‖ deep. The sleeves were quite tightly fitted to the arm with the arm holes cut quite tightly. Highly fashionable doublets often had the front seam of the sleeves left open to show off the fine shirt beneath. However, for most common men it would be warmer and more practical to keep this seam sewn up. Doublets tend to have been fastened with buttons at the front that were about 1‖ - 1 1/2 ― apart. Sleeves would reach to wrist, rather than the more highly fashionable shorter turned back sleeves of the wealthy. 


The sleeves should be made to slip over the hand easily, having a split along the outside seam at the wrist (about 3‖ or 4‖) fastened with a button(s) or maybe a hook and eye or even a pin. The collar should be about 2‖ deep and could fasten with a button(s) or be left unfastened. Shoulder wings are a feature of many more fashionable doublets but are by no means a universal requirement of the doublets of the lower orders. Doublets can be made from a range of colours. They could match a pair of britches if a suit is required. However, having a different coloured doublet to the colour of the britches can prevent a costume appearing to be too planned.


Jerkins and Waistcoats 

Jerkins were sleeveless garments worn over the doublet for additional warmth or protection. These were made from leather or hard-wearing wools like frieze or kersey.


There are some references also to waistcoats, either of cloth or as a knitted garment. These appear to be worn underneath the doublet and often seem to have sleeves. References to these garments appear for the wealthier classes, such as depictions in many Dutch paintings of a garment being worn beneath a doublet (often red in colour), or the documented wearing of a knitted silk waistcoat by Charles I on the day of his execution. Lower down the social scale, however, there is also some reference. A soldier in Sir William Fairfax‘s Regiment is said to have been shot during the assault on Leeds in the winter of 1642/3. He is recorded as wearing a waistcoat which, together with his coat, jerkin, doublet and shirt, sufficiently deadened the bullet‘s force, leaving only a burn on his skin.


The Coat

The coat is a woollen outer garment, often worn for additional protection from the weather. It can vary in length from hip length to below the knee. Most coats appear to be less shaped and tailored than doublets. Coats could have rounded necks or collars and could fasten with buttons or hooks and eyes. The soldiers‘ coats of the Battalia are of red wool lined with blue wool. For civilian coats, natural colours may be most appropriate, although dyed fabrics could be used.


Coat

The coat is a woollen outer garment, often worn for additional protection from the weather. It can vary in length from hip length to below the knee. Most coats appear to be less shaped and tailored than doublets. Coats could have rounded necks or collars and could fasten with buttons or hooks and eyes. The soldiers‘ coats of the Battalia are of red wool lined with blue wool. For civilian coats, natural colours may be most appropriate, although dyed fabrics could be used.


Collar

The collar (referred to also as a band) existed in the period both as a separate item and as part of the shirt that was sometimes folded outside the collar of the doublet. In both cases, however, many fantastic outfits have been ruined by a bad collar. Wide linen collars decorated with lace edging and starched to hold their shape were a feature of the fashions of the period for the wealthy. However, these are impractical to wear for most day to day tasks. Lace edging for the common people could also be a costly extravagance. The poor might wear narrow plain collars of linen that were tied in place with ties, or may not have worn them at all. In this case, an alternative to prevent sweat and grease from rubbing onto the doublet collar might be to tie a strip of linen about the neck.

Headgear

As with collars, good outfits can be ruined by the wrong headgear. Many re-enactors wear stiff black, brown or grey felt hats with broad brims. Similar hats can be seen in many illustrations, particularly the portraits of the wealthy. Properly stiffened felt hats of this kind were highly expensive when new. Indeed, this is the case today – to purchase a properly stiffened and appropriately shaped felted hat can cost upwards of £100! Such felt hats could find their way to the lower orders through the second hand market  but these would be battered, worn and lacking stiffness through prolonged wear and possible soaking with rain. There are references to cheaper versions of lesser quality being issued to soldiers prior to and during the Civil War. Hats can be decorated with a plain band of woollen or linen tape or a simple cord. It is best to avoid modern braids and the addition of favours. Avoid feathers – few depictions of the headgear of the poor seem to show feathers. Under no circumstances wear ostrich plumes, buckles or broaches. Chin straps of leather thronging seem not to be appropriate.


Another alternative for the common man could be knitted caps. Various styles are available and appropriate. Some caps could be fairly high crowned with a brim attached – it is possible that these might actually be what is shown in woodcuts rather than stiffened felt hats. A different pattern resembles bobble hats without the bobble, while oth- ers are flat crowned caps with a brim. Knitted caps were very common and records exist from the period of these being  purchased to clothe soldiers in the Civil War.


Shoes

A good pair of shoes can make an outfit. A pair of inappropriate shoes can ruin it. Strangely, footwear seems to be a focus of attention for the general public  who  attend recreations and re-enactments.


Several options exist for shoes. In terms of colours, avoid brightly dyed leather.


Go for browns or blacks. Round toes or square toes are both acceptable variations. Shoes with open latchets (holes in the side of the shoes be- tween the side and the tongue) are quite common, but equally so are closed shoes. Most shoes at the time appear to have small heels. There is evidence  that men wore  ankle  length  boots  at  times (sometimes called―start-ups‖  in  the  re-enactment  world).  If  you  make  the  decision  to  wear boots, then they would possibly be only for outside wear. The common  man should avoid the more expensive riding boot – these are best reserved for people of rank. It is best to buy a pair of shoes first as these can be worn both inside and out. Period shoes can seem expensive (£150—£200 is about average for a hand sewn pair). However, consider how  much some machine made shoes available on the high street today can cost and the price is put into perspective. Good quality handmade shoes that are comfortable and hard wearing are a must and can be easily repaired should they need to be.


Accessories

Belts are often shown in many images from the period and appear in written records as both belts and girdles. They appear to have been worn over coats or doublets. A range of designs for both belts and purses can be found looking at illustrations.


A re-enactment fashion has been to hang a whole range of items and artefacts from the belt. It would be worth considering the context of the event and whether the item being suspended actually has some link to the period - one re-enactment fashion has been to suspend pewter medals made to commemorate re-enactments from the belt. A knife would be appropriate, but a fashion for hanging pewter tankards from the belt should be avoided. Pewter was an expensive alloy that you would not want to loose if you had it. Some re-enactors choose to wear chunks of dead animals (rabbits‘ feet for example, or pieces of fur) suspended from belts. Again there is no real evidence from visual sources of this practice.


Jewellery can often spoil an outfit. For most common men, a simple band as a wedding ring (if a wedding ring was worn by a man in the first place) would be the only item of real jewellery that they owned. Few references exist to other items of jewellery being worn outside the upper classes. Another re-enactment fashion has been for antique broaches being worn to decorate head gear or to secure bunches of feathers to a hatband. These are best avoided. Obvious modern facial piercing should be removed. As for women, ideally obviously modern glasses should also be removed.

Basic Outfits for Men and Women


If you are putting together a basic outfit for the first time, the following garments are recommended as the basics.

Men

  • Shirt
  • Drawers
  • Hose & garters/ties
  • Shoes
  • Britches
  • Doublet
  • Hat/cap
  • (If portraying a soldier, a coat of Devereux's cut and colour will be needed also)

Women

  • Smock
  • Petticoat with bodies / skirt with separate body
  • Hose & garters/ties
  • Shoes
  • Waistcoat
  • Coif & forehead cloth
  • Neckcloth
  • Apron

Children - What Did They Wear?

Babies

The basics for babies of either sex appear to be the smock, resembling a miniature version of the adult garment. Made of linen, it is easy to launder, so a good supply may be an idea! Simple shaped necklines with a slit to mid chest (like the adult versions) tied with a single tape or cord through worked eyelets at the neck are possibly best, although small standing collars can be added if required. Being cut to a generous fit, these make changing baby easier. (Feeling brave?  You  could use linen tailclouts in place of nappies, but this is not essential!)


Babies appear to have worn linen caps similar to coifs – referred to as biggins in the period. It can be tempting to put Baby in a lacy number here. However, as with adults, lace is best avoided. A tie under the chin may be needed to keep the cap on.


Babies could also wear knitted socks to keep the feet warm. Shoes are a possibility. However, due to the rate at which children‘s feet grow together  with the fact that walking is not the primary method of movement for babies, not having shoes is not a problem.


Over the shirt or smock, a simple coat or gown may be worn. Made from wool and lined with linen and reaching to mid calf, this garment will provide warmth. It can be fastened front or back with tapes or but- tons. A separate skirt or petticoat could be worn beneath this if required.


Wealthier babies were provided with a whole host of additional clothing – bibs, aprons, mantles (often red blanket like items) and pinners to name but a few.


These were probably not as common for the lower orders. The basics mentioned above will probably serve for the lower orders.

We are realistic when it comes to young children being involved in our events – unlike adults, they do not fully understand what is going  on and the environment may cause them some distress. Some things are, however, hard to overlook. It may be pretty obvious, but it is worth mentioning about pushchairs – leave them behind when in kit and carry Baby. Also try to avoid modern toys. Period toys can be found at traders‘ fairs, or improvise. If a favourite teddy needs to go with you, try to hide it under the blanket that Baby is wrapped in, If a dummy is still needed then, for parental sanity, go with it, but maybe avoid a bright and obvious one. Bone teethers are available at traders‘ fairs and may be a suitable alternative. Most members of the public are understanding about these small compromises – just try to remove them when cameras are about.

Younger Boys (up to about 7)

The most noticeable difference between the clothing of younger boys today and their seventeenth century counterparts is the fact that young boys wore skirts. In most cases this does not cause a problem. Many of our boys have happily worn skirts. In the period, skirts tended to be worn to about the age of 7. However, gender identification may make it a necessity to accelerate the clothing process and put boys into britches earlier.


The basic undergarment remains the shirt – a miniature version of the man‘s garment and made out of linen. Having several of these may be an idea.


Over the shirt, boys would wear a woollen skirt reaching to mid calf or longer, but not long enough to drag in the mud. This may have been a skirt attached to a waistband and closed with a tape, or it could be attached to a linen petticoat body (as in the description for a women‘s petticoat) fastened with ties or  lacing at the front (or back if Sonny has a habit if undoing his ties).


Over this, a coat can be worn. This could be a larger version of the simple coat that babies may have worn. 

Illustrations survive, however, showing more tailored versions where the body appears to resemble the body of a doublet to which a skirt of similar length to the petticoat is attached. These versions can be fastened with buttons or ties. An alternative to the coat might be a smaller version of the doublet worn with the petticoat. These do appear for some older boys.  Coats or doublets  could have leading strings – reins – sewn in to the shoulder seams.


Linen caps (larger versions of those worn by babies) or knitted caps were worn. Knitted hose tied with tapes or garters and shoes can be worn. Many illustrations show children going barefoot, possibly because shoes were not available. However, this is inadvisable at most of our sites for health and safety reasons. It is possible to purchase period appropriate footwear, but this can prove costly as children grow out of shoes rapidly. A simple pattern is included for homemade shoes that, with the application of appropriate waterproofing, serve in all but the wettest weather. We are, however, realistic here. As boys are wearing skirts that go some way to hiding the feet, simple dark coloured modern shoes or boots may be a more appropriate compromise. Again, the public generally understand such compromises with younger children.


Girdles or belts appear frequently in illustrations over the top of coats - a handy addition for belting in garments with growing room. Also, girdles are a useful place to tuck the muckinder – a square of linen cloth used for wiping the young man‘s face.

Older Boys (from about 7)

Once a boy reached 7 years old, he would be dressed in clothes similar in style to his adult male relatives. Shirts, hose, shoes, britches, doublets, coats and caps would form the outfits of boys from this age.


Again, shoes may prove to be an issue as feet will still be growing. Apply the same guidance as above.


Young Girls (upto about 7)

For young girls, the smock remains the basic undergarment and resembles a miniature version of that worn by her female relatives. Easily washable, it is an idea to have several of these.


Over the smock, younger girls could resemble their male peers, having a petticoat (a smaller version of that described for women above) or possibly a woollen skirt attached to a waistband and fastened with a tie. Over this, a simple woollen gown can be worn. The body of the gown can fasten at the front (with hooks and eyes or, probably more practically, with ties or lacing through eyelet holes) or at the back (ties are best here). The neckline can be shaped to the neck or square cut and lower at the front, and the waist cut simply straight at the natural waist, a skirt being attached to the body reaching to the mid calf or lower. Leading strings – reins – can be sewn into the shoulder seams of the gown.


As with boys, the head was covered with a coif, possibly resembling more those worn by her female adult relatives as she grew up.


Knitted hose tied with garters or tapes and shoes complete the outfit. As with boys, it may be necessary to compromise with the shoes and wear dark modern shoes, or have a go at making shoes using the simple pattern included.


Older Girls (from about 7)

As with boys, from about this age, it becomes appropriate to dress girls in much the same way as adults. Smocks, petticoats, waistcoats, aprons, coifs, neckcloths, hose and shoes will form the outfit for older girls.


Again, shoes may prove to be an issue as feet will still be growing. Apply the same guidance as previously mentioned.

TAILORING TECHNIQUES

Making a toile and altering patterns.


The patterns included in this guide have been drawn out to generally fit the following:

Men‘s patterns

Height – approximately 5‘ 8‖

Chest 36 – 38‖

Waist 30 – 32‖

Women‘s patterns

Approximately modern size 12 Height – approximately 5‘ 6‖ Bust - 36‖

Waist – 28‖

Hips – 38‖


Children‘s patterns are drawn out for an infant of about 9 – 12 months, a toddler of about 3 years, and a child of about 7 years.


All pattern pieces are drawn with no seam allowances. This should be factored in when cutting materials. As with any sewing pattern, pieces will need to be adapted to fit the individual.


For most of the linen garments such as shirts and smocks, adding or taking away inches to make a pattern suitable for an individual will be quite straight forward as most of these garments are made from simple shapes and are not close fitting.


For garments such as bodies, doublets, britches, and waistcoats, it is recommended that a toile be made from cheap fabric. Approximations can be drawn out for each piece involved in the pattern. These can then be quickly pinned or stitched together and put on the body. If large seam allowances are left around the pattern pieces, then this toile can be let out or taken in to fit. From this, the pattern pieces can be drawn.


If you are making a garment for the first time please do ask for guidance. Within the group there are many amateur tailors and seamstresses who can help with fitting patterns.


For altering pattern pieces, some find it useful to draw out the pattern on paper, then to cut this pattern in to strips. These strips can be moved apart to enlarge a panel, or overlapped to reduce it as in the diagrams opposite. This may help to approximate the shape and size of pieces that can then be transferred to a toil for final alterations.

Construction Techniques

Garments of the period were all sewn together by hand. It is assumed that this is the method that will be used to reconstruct garments from the patterns provided.


For linens, hemming all of the raw edges of the fabric, then whipping seams together with small stitches (or maybe even using small blanket stitches) is an effective approach to use.


Many of the outer garments work better if they have interlinings of linen canvas as this often helps the outer fabric to lie better over the body. These are laid on the reverse  of the outer fabric of the garment and tacked in to place around the edges. The outer and interlinings are then treated as a single layer when constructing the garment.


For pairs of bodies and petticoat bodies, interlinings are essential in order that channels (castings) can be sewn to take boning. Reeds were a commonly used for this purpose, although more modern alternatives (such as steel boning) can be used providing that this is not visible when the garment is completed.


In some garments, such as doublets and petticoat bodies, additional pieces of linen can be pad stitched in place to further support garments to lie correctly and to add stiffening, for example over the shoulders or across the front of doublets. Pad stitches are rows of diagonal stitches (about ¾‖ long) that permanently secure pieces of fabric together.

Pad stitching through two or three layers of linen canvas can produce a surprising degree of stiffness within a garment.

Seams for outer garments can be worked in a number of ways. Backstitch or small running stitches can be used to sew through all of the layers that need to be seamed together. Another alternative is to fold back the seam allowances, place the pieces right sides together, and use whip stitch or small blanket stitches to sew these together, much in the same manner that linen undergarments can be whipped together.


When securing linings in place, whipping stitches can be used to over sew the linings in place. Another alternative is to sew linings in place using back stitches. Care needs to be taken, however, that the stitches pass through the lining and the turned back edges of the outer pieces only and do not show on the outside of the garment.


Pleating & Gathering

Seams for outer garments can be worked in a number of ways. Backstitch or small running stitches can be used to sew through all of the layers that need to be seamed together. Another alternative is to fold back the seam allowances, place the pieces right sides together, and use whip stitch or small blanket stitches to sew these together, much in the same manner that linen undergarments can be whipped together.


When securing linings in place, whipping stitches can be used to over sew the linings in place. Another alternative is to sew linings in place using back stitches. Care needs to be taken, however, that the stitches pass through the lining and the turned back edges of the outer pieces only and do not show on the outside of the garment.

Some garments, such as britches, may require knife pleats or box pleats when securing to the waistband. Knife pleats are flat pleats created by folding the fabric over on itself, much like a flattened "Z" shape when seen from the end. Box pleats are formed in a similar way with pairs of pleats formed with one pleat facing one way and the next pleat as a mirror image.


Skirts were often cartridge pleated onto a waistband or the waist of a body. To create cartridge pleats, cut the material for a skirt with a sizeable seam allowance on the waist (about 2-3‖). Fold this allowance over on to the inside of the skirt. Next, run a series of two or three parallel rows of running stitches which are about 3/4‖ long. Knot these stitches together at one end, then pull the other end of the stitches. The material will then gather in to large pleats similar to those achieved when using curtain tape (although please avoid using curtain tape for this purpose as some have done!). Knot the loose ends of the threads when the material has been gathered to the required length in order to secure the pleats. The skirt is now ready to be attached to a waistband or a body.

Button holes and eyelet holes

To work a button hole, first create a slit through the fabric where the button hole is needed. This slit will need to be large enough to take the button that is intended to pass through it, but typically 3/4― is large enough for most period buttons. Some tailors use sharp chisels to cut these slits, others use sharp scissors or a knife. Run a running stitch about 1/16‖ from the slit to hold the pieces together. Then work buttonhole stitches to cover the raw edge of the slit. The ends of the button hole can be worked by curving the stitching around the end or by sewing a series of longer straight stitches.


Button holes were often placed quite close together – about 1 – 1 ¼‖ seems to be an appropriate distance between holes. This means that the front of a doublet  could  typically  have  somewhere between 16 – 20 buttons closing it. Some illustrations do show buttons both closer and further apart that this as well.


Garments like bodies need eyelet holes to allow a cord or tape to be laced through them to pull the garment closed. In this case, eyelet holes need to be about 2‖ apart at most. Eyelet holes need to be worked through lacing bands inside doublets and


through the waistband of britches to allow them to be laced together if this is required. Eyelet holes can also be used for ties at the neck and cuffs of shirts and smocks, to close the waist of drawers, or to close the waists of britches and separate skirts.


Eyelets begin as a hole pushed through the fabric where the eyelet is needed. Pushing a knitting needle through the weave of the fabric is a good way to create this hole. Avoid punching the hole or cutting the fabric as this can weaken the weave of the material and lead to the eyelet gradually starting to tear.


The edge of this hole can be secured with running stitches to hold the different layers together. Over this running stitch, buttonhole stitch is then worked around the hole.

Some Simple Patterns

REMEMBER – the patterns drawn out here will need to be altered to fit the individual as they are a guide only. It is recommended that a toile is first made up for most garments using cheap fabric to allow for the patterns to be altered to fit the individual. The final pattern can then be taken from this.


Pattern pieces are drawn out without seam allowances and these will need to be added.

       
The patterns and instructions here have been simplified in order to allow
for them to be accessible to novice tailors and seamstresses.

A Smock and a Shirt

You will need about 2 ½ - 3 yards of linen (60‖ wide) for these garments depending on the required fullness of the finished garment. Cut the front and back body pieces. Cut the slit down the front. Fold back and hem the raw edges. The bottom of the slit can be finished with a small row of buttonhole stitches if required.


Hem all of the edges of both the front and back body pieces. Seam the shoulders inserting small triangular inserts about 1‖ wide to open up the neck.


Cut the collar if this is required. Fold this in two and fold the raw edges in. Sew closed the short sides of the collar. Place the long open side of the collar piece against the right side of the body pieces and whip the collar on to the body pieces.


Cut the sleeve pieces and the under arm inserts. Hem all of the pieces.


Sew the under arm inserts on to the sleeve pieces. Seam the length of the sleeve leaving about 3‖ open at the wrist.


Cut the cuff bands. Hem these and fold these in the same way as the collar. Gather the wrist of the sleeves to the required width and whip the cuffs on to the sleeves.


Sew the sleeves to the body pieces. Seam the sides of the body pieces.


Work pairs of eyelet holes in the cuffs and collar for ties.

Men’s Drawers

These can be made comfortably from about one yard of linen (60‖ wide).


Cut two of the leg pieces. Hem all of the edges of both pieces. Sew the inside leg seams of each leg.

Sew together the two legs from the bottom of the front opening around to the back waist.


Cut the waistband. Fold this in half and sew closed the short ends of the band.


Pleat the waist of the leg pieces to fit the waistband and sew these together.


Work a pair of eyelet holes at the front of the waist for a tie.


Sew ties to the outside of each leg if these are required to hold up hose.


Hose

NB - It is essential that a toile for this pattern is made up to ensure that it fits perfectly to the leg and reaches the required height up the thigh.


You will need about 1 ½ yards of fabric for these. They are cut on the bias (diagonally across the fabric) to provide stretch in the hose.


Cut the leg piece on the bias. Cut the slits at the ankle. Turn over the raw edges and hem these. A few small button hole stitches may be needed at the top of the slits. Hem remaining edges of the leg piece.


Cut out the sole and hem the edges. Sew the sole in place with the long ankle pieces filling the slits that were cut in the leg.


Sew the seam under the heel and up the leg. Sew eyelet holes at the top of the leg should hose need to be tied to drawers.

Apron

To make an apron, cut a rectan- gle of wool or linen that is 24‖ along the top and as many inches as is needed to fall from the waist to about 4‖ above the hem of the petticoat skirt. Hem around the sides of the rectangle.


Measure in about 3‖ or 4‖ from the corners along the top of the rectangle. Work an eyelet hole at both of these points. Thread a tape or cord through each of these holes as the apron strings.


Kerchief

Very simple to make, a kerchief is a square of linen that is about 30‖ by 30‖. Turn over the raw edges and hem all the way around the square.


Simple Coif and Forehead Cloth

Cut the coif pattern from linen. Hem the top and the sides.


Fold in half and sew together the top seam, leaving the rear of this open. Gather and pull together the opening on the crown of the coif.


Turn over the raw edge at the bottom of the coif to make a casting to take a cord to tie the coif.


Triangular forehead cloth - cut the triangle of fabric for the forehead cloth. Hem all raw edges. Attach ties at the two front corners long enough to tie the cloth at the back of the head.


Rectangular forehead cloth – cut the rectangle of fabric. Fold as indicated, turn under the edges and sew, Attach tapes at the centre of each of the short sides of the rectangle, or work an eyelet hole on each side to carry a tie.


Britches

You need about 2 yards of outer fabric (60‖ wide), and the same for lining fabric. You may wish to use interlining fabric (linen canvas) depending on the weight of the outer fabric and to provide weight to the waistband.


Cut the four leg pieces in the outer fabric. If interlinings are needed, cut these from linen canvas. Place them on the wrong side of the leg pieces and tack these in place. Treat the outer and interlinings as a single layer.


Sew the side seams, leaving about 1‖ open at the bottom of the leg. If pockets are required, leave the opening in the side seam to take these.


Sew the legs together from the bottom of the front fly opening between the legs and up the seam to the back waist. Leave the top inch at the back waist open.


Turn up and sew the hems of the britches at the knee.


If pockets are required, cut these from the lining fabric. Fold these in half and sew the top and bottom seams. Insert the pockets in to the openings left for them. Fold over the raw edges of the pocket and sew in place to the outer fabric.


Cut the four leg pieces from the lining fabric. Sew up the outside leg seams leaving the bottom 1‖ open. Sew the legs together from the bottom of the front fly opening between the legs and up the seam to the back waist. Leave the top inch at the back waist open.


Put the lining in place. Turn under the raw edges of the outer and lining and sew in place at the knees and either side of the fly opening.


Cut the waistband pieces. If interlining is needed, cut interlining pieces and place these on the wrong side of the fabric. Treat these as one layer. Using knife pleats or box pleats, reduce the waist of the britches to the measurement required to fit to the waistband pieces. Take one of the waistband pieces. Place this on one side of the waist of the britches right sides together. Sew the waistband to the britches. Fold the waistband in half, turn under a small hem and stitch this to the inside of the britches. Repeat with the other piece of the waistband.


Work button holes as required down the fly fastening. Attach corresponding buttons to the opposite edge of the fly opening. Work a pair or two pairs of eyelet holes to take a tie to close the waistband at the centre front. Alternatively, work a button hole and sew a button to close this. Work a pair of eyelet holes to close the centre back of the waistband.

A Doublet

NB – this is a garment that is advisable to make as a toile first in order that the pattern fits the individual.


You will need about 2 yards of outer fabric and the same of lining and of interlining fabric.


Cut body pieces from the interlining. Cut additional pieces as indicated on the pattern across the shoulders and for the belly pieces. Pad stitch these in place.


Cut the body pieces in the outer fabric. Place the interlinings on to the wrong side of the outer fabric and tack in to place. Treat these as one piece. Sew the shoulder and back seams.


Cut the collar from the outer fabric, the interlining and the lining. Place the interlining on to the wrong side of the outer fabric and tack in to place. Seam the wrong side of the collar outer and collar lining along the top edge. Turn this right side out and sew to the neck of the doublet. If button loops are to be used to close the collar, sew these in place to the right hand side (as you look at the outer fabric) before sewing on the lining.


Make up the skirts. Cut the outer fabric, lining and, if required, interlinings. Place interlinings on the wrong side of the outer fabric and tack in to place. Put the outer and linings together right sides together. Seam the sides and bottom of each of the skirts and turn these inside out. Sew skirts to the waist of the doublet.

If required, cut the lacing band from the interlining fabric and the lining fabric. Place the interlining and lining together and fold in half. Turn under the raw edges of lining and interlining at the short ends and sew. Sew the band in place along the inside of the skirts at the waist.


Cut the sleeves from the outer fabric, lining and, if required, interlinings. Place interlinings on the wrong side of the outer fabric and tack in place, treating these as one layer. Place the outer sleeve pieces right sides together and sew both the inside and outside seams. Leave the outside seam open about 4‖ from the wrist. If hooks and eyes are to be used to close the sleeves, stitch these in place.

Take the lining pieces and sew both seams as the outer. Put lining in place. Turn under the raw edges of both outer and lining at the wrist and sew.


Cut shoulder wings from the outer fabric. Fold in half. Turn under the raw edges and sew closed.


Pin or tack shoulder wings in place. Then put sleeves in place and sew through both sleeves and wings to attach them to the doublet body.


Cut the body pieces from the lining fabric and sew together at the shoulder and sides. Put the lining in place, turn under the raw edges and sew at the waist, up the front of the doublet, around the collar, and both arm holes.


Work button holes on the right front (as you look at it) of the doublet about 1‖ – 1 ½‖ apart. Work a button hole or holes on the collar if these are re- quired to close the collar. Work button holes along the outside of the wrist opening if these are required to close the wrist. Sew in place corresponding buttons.


If a lacing band has been attached, work pairs of eyelet holes through the lacing band to correspond to pairs of holes that have been worked through the waist of britches that may require attaching to the doublet.

A Petticoat

NB – this is a garment where it is essential to fit the pattern to the individual by using a toile and taking a pattern from this. The body of the petticoat should fit tightly to the individual as this is what will provide support for the bust. A petticoat body that is too loose will be uncomfortable.


For the body, about one yard of linen (60‖ wide) is needed for the outer and lining, assuming that these are to be the same fabric. A similar amount of thicker linen canvas for the interlinings is also needed. If additional boning is to be used, there are several options. Steel boning is available from haberdashery shops. If this is used, cutting the boning to the required length can leave sharp edges that need to be covered or sealed in some way to that they do not cut stitches or fabric holding them in place. Some people have used thin dowel (about the thickness of barbecue skewers) to good effect. The use of chop sticks has also been known! The period option of reeds can be used, although these will need to be collected and dried before use.


For the skirt, enough wool will be needed for a rectangle that is about 2 ½ to 3 yards wide and as long as the distance needed from the waist to about 3‖ above the ankle. A hefty seam allowance of 2-3‖ will need to be added to the top of the skirt as this will be needed when using cartridge pleating to gather the skirt. The skirt could be a single piece of fabric or made from a series of rectangular panels sewn together vertically down the skirt. If a lining is required for the skirt, the same amount of linen will be needed for the lining.


Cut the body pieces from the interlining fabric. Cut also the pieces to place on the front of the body pieces for stiffening. If pad stitching, cut two of these pieces for each side. Lay both of these pieces on the interlining and pad stitch in place. If boning is to be used, cut one piece. Position this on the interlining and sew channels made from two rows of parallel running stitches as indicated on the pattern to carry the boning, making sure that the channels are just wide enough to take the boning material to be used. Ensure that the top of the channels are stitched closed securely in order that the boning is not pushed out of the top of the channels through wear. Small back stitches may be the best option for closing the top of these channels. Push the boning material in to place from the bottom of each channel.


Cut the body pieces from the outer fabric. Place the interlining on the wrong side of the outer fabric, tack around the edge and treat this as one layer. Sew together the body pieces at the shoulder and back seams. Cut the lining for the body. Sew pieces together at the shoulder and back seams.


Position the lining. Turn the raw edges of both the outer and the lining un- der and sew around the waist, up both sides of the body front, and around the neck. Turn under the raw edges of the outer and lining around both arm holes and sew.


Work eyelet holes down each side of the front of the body. Sew about 6 or 7 eyelets spaced equally down each side of the body front.


Cut the rectangle of wool for the skirt. Hem the edges that will form the seam at the front of the skirt. Turn over the raw edge at the top of the rec- tangle. If lining is required, cut a linen rectangle of the same size. Hem the front edges, place the lining fabric on to the wrong side of the outer and turn over the raw edge. Treat these as one layer for the next stage.


Gather the skirt in to cartridge pleats. Measure in along the waist of the skirt about 3‖ and begin to sew two parallel rows of large running stitches (about 3/4 ― wide) along the length of the waist, beginning from the inside of the skirt, finishing about 3‖ from the other end of the waist with the threads on the inside of the skirt. Secure one end of these stitches by knotting the two threads together. Pull the loose ends of both threads to gather up the cartridge pleats. Knot the threads to hold the pleats in place.


Place the right side of pleats against the right side of the waist of the body and sew the skirt in place.


Sew the front seam of the skirt together. Leave the seam open for about 10‖ from the waist. If the skirt is lined, treat the lining and outer as separate layers and sew these separately. Hem the bottom of the skirt outer and the lining if one has been used.


Skirt

For a separate skirt, enough wool will be needed for a rectangle that is about 2 ½ to 3 yards wide and as long as the distance needed from the waist to about 3‖ above the ankle. A hefty seam allowance of 2-3‖ will need to be added to the top of the skirt as this will be needed when using cartridge pleating to gather the skirt. The skirt could be a single piece of fabric or made from a series of rectangular panels sewn together vertically down the skirt

Cut the rectangle of wool for the skirt. Hem the edges that will form the back seam of the skirt. Turn over the raw edge at the top of the rectangle.


Gather the skirt in to cartridge pleats. Measure in along the waist of the skirt about 3‖ and begin to sew two parallel rows of large running stitches (about 3/4 ― wide) along the length of the waist, beginning from the inside of the skirt, finishing about 3‖ from the other end of the waist with the threads on the inside of the skirt. Secure one end of these stitches by knotting the two threads together. Pull the loose ends of both threads to gather up the cartridge pleats. Knot the threads to hold the pleats in place.


Cut a waistband from the same fabric as the skirt. Cut a strip about 3‖ wide and as long as is needed to go around the waist. Fold this strip lengthways. Fold under and sew the raw edges. Work an eyelet hole at each end of the band to carry a tie to close it.


Place the right side of pleats against the waistband and sew the skirt in place.


Sew the back seam of the skirt together. Leave the seam open for about 10‖ from the waist.


Hem the bottom of the skirt.

by Alan Turton 31 Oct, 2021
Malmesbury in the First Civil War – 1642-46 By Alan Turton
10 Jul, 2021
The chaos of battle: controlled by the beat of a drum...
10 Jul, 2021
Big Dave & Little Wayne demonstrate postures of the pike and the calls of war...
by Nick Boyle 03 Jun, 2021
28 May, 2021
If you are interested in the 17th Century, and the 'English Civil Wars' period, we recommend the following literature... General Politics/Military
by Charles Kightly 20 May, 2021
[Note: This series of articles was written by Charles Kightly, illustrated by Anthony Barton and first published in Military Modelling Magazine. The series is reproduced here with the kind permission of Charles Kightly and Anthony Barton. Typographical errors have been corrected and comments on the original articles are shown in bold within square brackets.]
by Kathleen Davies 28 Apr, 2021
Housekeeping I will be referring to men and women as those people possessing a penis and vagina respectively - there are very few sources I can find for discussing how the medieval people thought about intersex individuals, so I’m just leaving that out. I will also be using both clinical and slang terms for body parts and activities, where appropriate - these terms may be offensive at times, again, I’m trying to reflect the medieval attitude towards men, women and sex. Try to keep sniggering to a minimum. This goes double for Ant. Chapter 1: Who is doing it? The Ladies Women’s status in medieval society is defined by their relationship status, which largely also dictates their sexual status. Women can be: Virgins - not allowed to have sex Wives - allowed to have sex, with certain rules Widows - have had sex before, but not currently allowed to have sex. Whores - allowed to have sex, but socially excluded and vilified Women are only allowed to have sex within a marriage to be respectable - all other women are supposed to be celibate to maintain societal worth. Virgins can be of two types: Virgins by circumstance - young, unmarried women, whose choices are marriage, if they can find a husband, or taking a vow of virginity Virgins by choice - this normally means nuns. It can also mean married or widowed women who have taken a formal vow of chastity before a bishop. Two famous examples of this are Margery Kempe (1373-1438 approx.), who negotiated a ‘chaste marriage’ with her husband after 14 children to devote her life to God, and Margaret Beaufort who took a vow of chastity in 1499 (with her husband’s permission). Contrary to current common wisdom which states that men think about sex every sex seconds...I mean six seconds...in medieval society, everyone knew that women are UP FOR IT. ALL THE TIME. It was thought that not only do women want sex more than men, but that they gain greater pleasure from the act as well. This, coupled with their innate weakness and susceptibility to temptation, leads to a greater need to control their sexual access to prevent sin and bastards overrunning the earth. Women were expected to go to the marriage bed a virgin and to confine their sexual activity to their husband, but ‘wife out to get extracurricular sex’ was an extremely well-worn trope, and prosecutions in court for adultery and fornication were fairly common. Prostitutes held a very particular place in the medieval mindset. Even the great Church fathers St. Augustine and St. Thomas Aquinas recognise that prostitution serves a public good. It wasn’t seen as ironic that the Bishop of Winchester taxed and regulated the sex trade in Southwark in the 15th century. Prostitutes themselves were also seen as a breed apart from respectable women - they were not the lowest of the low - many of the C15th Ordinances are regulations protecting the prostitutes themselves from exploitation by brothel keepers or stewhouses, but there were also rules on public dress for them, so that respectable members of society knew at a glance their profession. The Gents Gents were much less defined by their sexual status, and while it was acknowledged that men should also not be sowing their wild oats too much because it is immoral, the church and court punishments for adultery and fornication for men are less severe in practice. There are celibate men in members of the clergy and men in holy orders, but celibacy for priests is only made canon law in 1123, and this with an emphasis on the ‘unmarried’ meaning of the term; sexual continence was also expected, but it was something that was recognised as difficult. There are court cases of clergy with ‘housekeepers’ who seem to fall pregnant while unmarried a fair amount, and there are increasing urban legends of clerical sexual misconduct as the reformation draws closer, which while probably largely fabricated, was plausible enough to be accepted. Chapter 2: Why are they doing it? Nature Calls Medieval medicine and understanding of biology was based on Ancient Greek and Roman texts, with Galen, Hippocrates and Aristotle having a big influence. The accepted wisdom is that there are four humours in the body, corresponding to four qualities, four elements and four temperaments. Blood, Black Bile, Yellow Bile and Phlegm are in turns Hot, Cold, Dry and Wet. Men are hot and dry - this is optimal. Women, however are cold and wet by nature. When your humours are out of whack, it leads to illness. Men, by virtue of their hotness and dryness, are able to burn off excess and imbalanced humours and thus not be polluted by them, whereas women lack the heat to do so. This leads to both menstruation (explained as the purging of those poisonous excess humours) and to their desire for sex - sex generates the heat they lack and male seed provides heat as well. This is why women are always UP FOR IT. It is also important for men and women to have regular sex as a mechanism to keep their bodily humours in the correct balance.
by Spencer Houghton 09 Apr, 2021
The simple answer to this question is yes; Black People (People of African dependency) had been part of the British landscape for 1500 years when the Civil War broke out. Earliest records of Black people in Britain goes back to 210AD when a Black Roman soldier was described in military records as “this Ethiopian of great frame amongst clowns and good for a laugh”. Later in the 3rd Century up to 500 Roman cavalry originating from Sudan and Ethiopia who were part of the Muarorum Aurelianorum which was named after Emperor Marcus Aurelius who was described as a “Moor”. More evidence of Black troops being part of Roman Britain on Hadrian’s Wall at a fort at Aballava near Burgh by Sands , Carlisle and modern DNA testing of the existing inhabitants shows much higher than average levels of African DNA indicating that they troops mingled with the local indigenous population potentially marrying and having families. Archaeological excavations in Sycamore Terrace, York discovered a 4th Century high status stone coffin containing the remains of the “Ivory Bangle Lady” who was a sub Saharan Black lady about 5 foot tall who died in her early 20’s. She was well nourished and the grave was adorned with high status grave goods. The archaeologists suspected she could have been the wife of a senior military commander or a successful trader. Continued excavations on the site and the subsequent DNA testing of skeleton’s led to an estimate that up to 10% of this important Roman city had their origins in Africa. Not all evidence of Black people in early Britain were directly related to the Roman army, in 1953 the discovery of “Beachy Head Lady” during an excavation of an early Anglo-Saxon cemetery from about 200-245AD that raised in excess of 300 skeleton’s. This one skeleton, during DNA testing, showed that this young woman originated sub-Saharan Africa although brought up and lived for some time in Sussex.
by Spencer Houghton 09 Apr, 2021
As many of you know, I do medieval (War of the Roses) re-enactment in my spare time and a lot of this takes the form of archery and not just dressing up in lots of tin and battering each other One of the questions that is asked by the public is about the use and effectiveness of the longbow compared with the matchlock. From my personal point of view, I would take a longbow over a musket any day but apart from the illustrations by William Neade’s Double Armed Man project of 1625, I have not seen any real evidence of its use However, I did stumble across an excerpt from a book called “Seventeenth-Century Military Archery” by E.T Fox that provides evidence of significant use and some lovely illustrations. The author explains how as a weapon of war, the longbow began to fall from favour in the sixteenth century, so much so that King Henry VIII had to introduce a number of statutes enforcing the practicing of archery in an attempt to maintain a force of available archers if required. In Queen Elizabeth I reign, the longbow less and less popular until, in 1589, her Privy Council reorganised the trained bands and removed archers from their ranks. With its strong tradition though, the longbow didn’t disappear and its use continued particularly in provincial and rural regions well into the seventeenth century. In Repton, Derbyshire, mustered militia men had “a cote and bowe and a shiffe of arrows and a quiver” in the reign of James I and as late as 1628, Sir Phillip Carteret wrote that Jersey had a force of 3000 able bodied men for the defence of the island, of whom 300 were armed with musket and pikes, “the rest having bows, bills and unarmed” As late as 1638, the Earl of Arundel at Carlisle requested, “some quantity of bows with offensive arrows should be poured into the bordering shires of Cumbria, Northumberland and Westmorland” During the seventeenth century there were a number of schemes to revive the use of the longbow, the best known of which is probably the famous William Neade’s project of 1625 that we all know as the “Double Armed Man”. Neade’s idea was that by arming a pikeman with a longbow in addition to the pike, they would no longer be restricted to standing around on the battlefield getting shot for the majority of the time and waiting just in case they were needed to defend the remaining troops from cavalry. Armed with a longbow they would have an offensive role in addition to their defensive capability.
by Tim Edwards 09 Apr, 2021
Key Points... There is occasional evidence for the use of tents by ordinary soldiers, but billeting in existing civilian buildings or purpose built huts was far more common. Tents were normally the preserve of officers during the English Civil War. The use of tents by regular soldiers was much more common during the contemporary wars in Ireland and Scotland. Where tents were used en masse, they seem to have been made to a standard design: 7ft square and 6ft high, to accommodate a file of six soldiers. Introduction... This article is formed of two parts: the evidence for tent use by soldiers during the Civil Wars, and where issued, the form and fabric of such tents. Our focus is on the British Isles during the 1640s and 1650s. Evidence from the continent and from earlier and later eras is incorporated into Part Two, as it helps to inform our overall understanding and acts as bridge across knowledge gaps when we are compelled to make choices in physical reconstruction. Two surviving examples of 17th century tents, from Austria and Switzerland, are used as examples of tent-making techniques. The layout and organisation of camps, or castramentation, is a vast subject by its self, and will not be examined in this article. Mark will be leading a separate debate over the choices we have in portraying a 17th century encampment. Part One: The Nature of Evidence for Tent Usage There is evidence for use of tents by common soldiers during the English Civil War, however it is very limited. There is a comprehensive and objective summary of the available evidence in A.J.Rowland’s “Military Encampments of the English Civil Wars”, published by Stuart Press. I would heartily recommend anyone with an interest in the subject to beg, borrow or steal a copy. Factors in Choosing Shelter. Therefore, the type of overnight shelter available to our generic ECW infantryman would depend upon a series of factors – the tactical activity of the unit, coherent forward planning, the weather, the availability of civilian buildings, time available for setting up the camp, and time in place, availability of timber and thatch, and the immediacy of the threat posed by the adversary. Billeting as the Default Option Suffice to say, it appears that sleeping in billets (requisitioned civilian buildings) was most common, for most soldiers, most of the time. Suitable billeting sites would be planned and reconnoitred in advance. Only on occasion were soldiers forced to sleep outside, under which circumstances hedges, bushes and trees served as overnight shelters. Better Hutting than Tenting. Where time allowed impromptu shelters known as ‘huts ‘were built, but this was dependent on arrival at the campsite early enough for the surrounding countryside to be ransacked for wood and thatching. Despite the time required to build, and resulting impact on local communities, huts appear to have been preferred over tents. When well constructed, they would be more weatherproof than the average tent and when no longer required could simply be burned rather than require transportation. Fig 1: An officer’s tent, with sentinel. Detail from the portrait of Sir Horace Vere (Sir Thomas Fairfax’s father in-law)
More posts
Share by: